今天小编为大家带来了FileZilla更改连接超时秒数教程,想知道怎么做的小伙伴来看看接下来的这篇文章吧,相信一定会帮到你们的。
FileZilla怎么更改连接超时秒数?FileZilla更改连接超时秒数教程
1、首先点击“FileZilla”。

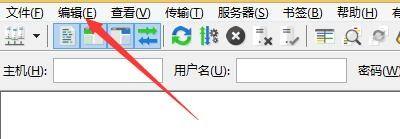
2、然后在“FileZilla”窗口中,点击“编辑”。
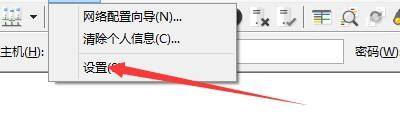
3、在弹出下拉栏中,点击“设置”。
4、在“设置”窗口中,点击“连接”。
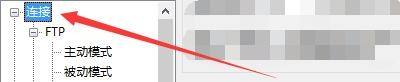
5、接着在“连接”窗口中,将“超时秒数20秒”更改为“30秒”。

6、最后点击“确定”即可。

以上这篇文章就是FileZilla更改连接超时秒数教程,更多教程尽在下载之家。